


Step-by-Step Cold Air Intake Installation for British Sports Coupes
Installing a cold air intake system in your British sports coupe, such as a Jaguar, Lotus, or Aston Martin, can be a rewarding DIY project. This guide leads you through every step with clarity and precision. Begin by disconnecting the battery to ensure safety. Next, remove the existing air intake components carefully, keeping track of fasteners and sensors.
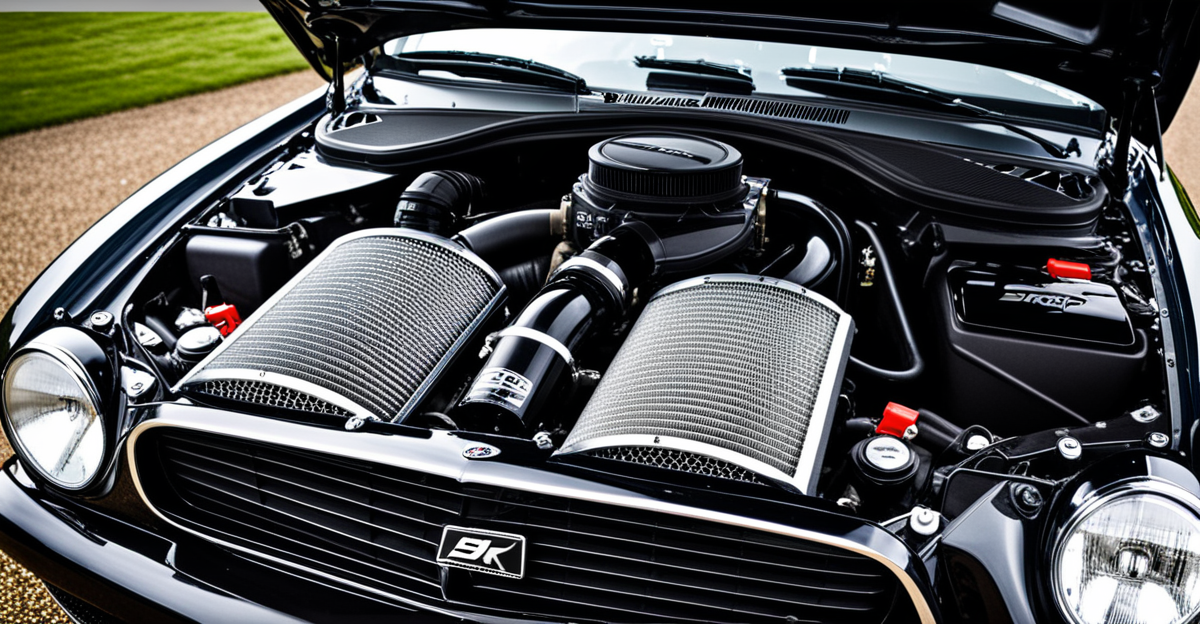
Focus on fitting the new cold air intake tubing, ensuring all clamps and connections are secure and free from leaks. Misalignment or loose fittings can reduce performance. Pay special attention to the intake filter placement; it should be positioned to draw cold air away from heat sources, maximizing the benefits of your upgrade.
Additional reading : Mastering Wheel Balance: Unlocking Superior High-Speed Performance in British Racing Cars
Throughout the installation, use provided diagrams to verify correct orientation and part placement. Double-check connections to avoid vacuum leaks or sensor errors later. Tighten all hardware to the manufacturer’s recommended torque settings.
This DIY guide not only saves cost but also deepens your understanding of your British coupe’s intake system. The investment of careful effort here leads to enhanced throttle response and horsepower, making your classic car’s performance truly sing.
Also to see : The Comprehensive Guide to Mastering Parking Sensor Installation and Calibration for UK Vehicles
Required Tools, Parts, and Preparation
Before starting your cold air intake installation, gather all necessary tools and parts to streamline the process. Essential tools include a socket wrench set, screwdrivers, pliers, and torque wrench. These tools enable you to remove the factory intake components and securely install the new system. A parts checklist should cover the cold air intake tubing, clamps, filter, and any included gaskets or adapters specific to your British sports coupe model, such as Jaguar, Lotus, or Aston Martin.
Preparation begins with selecting a clean, well-lit workspace to avoid losing small fasteners and to provide ample room for maneuvering. Perform preliminary engine checks: ensure the engine is cool to protect sensitive sensors and avoid burns. Verify compatibility between the cold air intake parts and your vehicle model to prevent fitting issues—different marques and years might require distinct components or additional adapters.
Using manufacturer-provided diagrams or visual guides, cross-reference every part before installation. This prep phase is vital for a smooth, efficient process and helps reduce troubleshooting later. Proper preparation reflects the core of this DIY guide, enhancing both installation success and performance outcomes.
Step-by-Step Cold Air Intake Installation for British Sports Coupes
In this DIY guide, begin your cold air intake installation by thoroughly reviewing the manufacturer’s diagrams. These visual guides are essential to understand the correct orientation and placement of each component for your British sports coupe—whether Jaguar, Lotus, or Aston Martin. Start by removing the factory air intake assembly carefully; this prevents damage to sensitive sensors often present in these marques.
Next, fit the new cold air intake tubing, ensuring a snug, leak-free connection at every junction. Use supplied clamps and tighten them evenly to avoid misalignment. Proper sealing is crucial to maintain optimal airflow and prevent vacuum leaks, which can cause performance issues or sensor errors.
Place the air filter so it draws air from a cooler, less turbulent area—this maximizes the cold air intake benefits. During assembly, constant reference to the DIY guide and detailed diagrams helps confirm each step is correctly completed. Finally, reattach all sensors and double-check all fasteners using a torque wrench to manufacturer specifications, ensuring safety and performance reliability.
Following these precise steps will enhance your British coupe’s airflow system efficiently, providing the foundation for improved throttle response and horsepower.
Troubleshooting Installation Issues
When facing installation issues during your cold air intake installation for a British sports coupe, precise diagnosis is key. Common errors include vacuum leaks caused by loose clamps or misaligned tubing. Such leaks can trigger sensor errors, degrading engine performance. To identify leaks, carefully inspect all junctions for gaps or unusual noises during engine idle.
Another typical problem arises from incorrect sensor reconnections. The mass airflow sensor or intake temperature sensor must be reattached exactly as per the DIY guide to prevent false readings. If the engine check light activates after installation, double-check these connections first.
Post-installation, monitor engine idle and throttle response closely. Hesitation or rough idling can indicate fitting issues or leaks. Use the manufacturer’s diagrams to verify correct tubing orientation and sensor placement meticulously.
Should troubleshooting steps fail, consider professional assistance, especially if complex wiring or ECU recalibration is needed. Meticulous tightening of clamps with a torque wrench, as described in the guide, also minimizes recurring problems. Addressing these installation issues promptly ensures your British sports coupe benefits fully from the cold air intake upgrade without risking long-term damage or performance loss.
Step-by-Step Cold Air Intake Installation for British Sports Coupes
This DIY guide provides a precise process tailored for British sports coupes like Jaguar, Lotus, and Aston Martin. Begin by consulting comprehensive diagrams showing each part’s exact placement. Carefully remove the factory air intake, preserving sensors critical to system function.
Install the new cold air intake tubing with focus on airtight seals. Tighten clamps uniformly to prevent leaks that disrupt airflow or trigger sensor errors. The cold air intake installation also involves positioning the filter strategically to draw cooler air — away from engine heat — maximizing performance gains.
Double-check each connection against the visual guides provided with your system. If a question arises, refer back to these detailed diagrams; they ensure you avoid common pitfalls such as reversed tubing or misplaced sensors. When all parts align correctly, secure fasteners using a torque wrench within manufacturer specifications to maintain safety and functionality.
This methodical cold air intake installation not only elevates throttle response and horsepower but also nurtures your mechanical skills, empowering you to maintain and upgrade your British sports coupe confidently.
Step-by-Step Cold Air Intake Installation for British Sports Coupes
Detailed cold air intake installation for your British sports coupe—be it a Jaguar, Lotus, or Aston Martin—requires a methodical approach. Begin by carefully reviewing the manufacturer’s diagrams and the DIY guide to identify every component’s precise location and orientation. These visual aids are crucial, as correct assembly prevents airflow restrictions and sensor errors.
Start by detaching the factory air intake assembly without damaging sensors. Next, install the new cold air intake tubing, making sure all clamps are tight and connections airtight. A leak-free seal ensures consistent air pressure and prevents engine warning lights from activating.
Position the air filter to draw the coolest air possible, locating it away from engine heat zones. Follow the DIY guide closely to verify every sensor is reconnected properly and to double-check tubing alignment. Use a torque wrench to fasten hardware to manufacturer specifications, securing durability and safe operation.
Deviating from these steps risks performance loss or engine malfunction, so referencing the included diagrams and adhering to this comprehensive procedure ensures your British sports coupe achieves optimal power and throttle response after the cold air intake installation.
Step-by-Step Cold Air Intake Installation for British Sports Coupes
Your detailed guide to each precise action
Begin your cold air intake installation by laying out all parts and tools from the DIY guide in your workspace. This ensures smooth progress, especially for intricate models like Jaguar, Lotus, and Aston Martin. Step one involves disconnecting the battery to prevent electrical mishaps.
Next, remove the stock air intake assembly carefully, preserving sensors integral to engine management. Follow each step in the DIY guide, referring continually to the provided diagrams. The visual aids clarify the orientation of the new intake tubing and filter placement, essential for optimizing cold air flow in your British sports coupe.
When fitting the new tubing, ensure all clamps are snug but avoid overtightening; uneven pressure can cause leaks or damage. Position the air filter away from heat sources, securing it to avoid vibrations that may loosen connections. Reconnect sensors and verify all electrical connections against the schematic in your DIY guide.
Use a torque wrench to tighten clamps and fasteners to manufacturer specifications—this prevents performance loss or sensor errors. Every step demands precision, as mistakes here compromise the benefits your British sports coupe gains from the cold air intake installation.